
During the installation process, RapidIdentity Server creates application keys to communicate with the SQL database.
Backing up the Server Key preserves the ability to communicate with the RapidIdentity Server database in the event that the server must be uninstalled, reinstalled, moved or distributed across multiple IIS servers. If the RapidIdentity Server keys are not backed up prior to uninstalling the Server application, database information recovery is not possible.
For deployments where multiple MFA Servers are going to communicate with a single SQL instance or farm, each MFA Server must utilize the same encryption key in order to access the encrypted data stored in the database.
The following steps will walk you through the backup and restoration processes. These steps should be performed for each subsequent MFA Server before any server operation is performed.
Server Key Backup
-
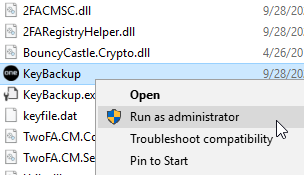
Navigate to your MFA server’s respective installation folder and go into the “Tools” folder.
4.9.4.6 or lower:C:\Program Files\2FA\ONE Server\Tools\KeyBackup
4.9.5.1 or higher:C:\Program Files\Identity Automation\RapidIdentity MFA\Tools\KeyBackupUpgrading Your MFA ServerIf your MFA server is not up to version 4.9.5.1 or later, it is strongly recommended to upgrade. Please see our server upgrade information page for more information.
-
Right-click the application KeyBackup > Run as administrator.
-
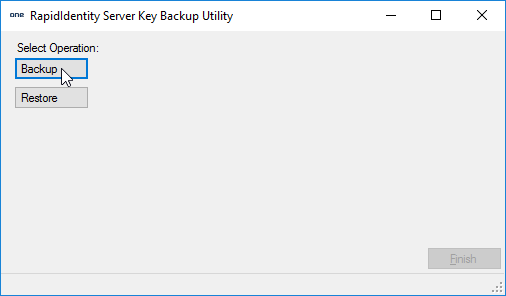
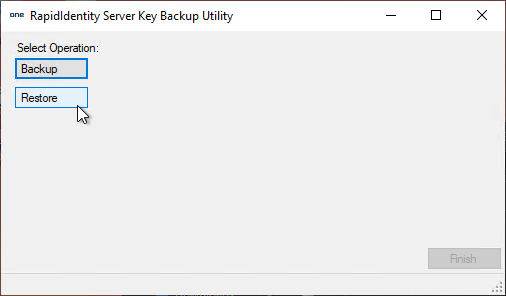
Select the Backup option.
-
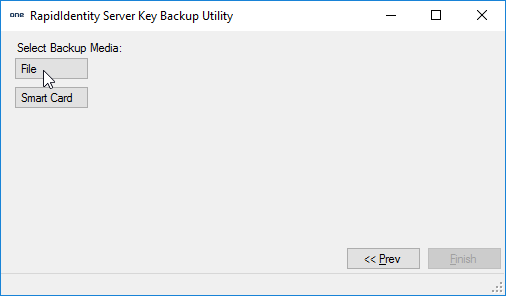
Choose to save your backup as a File.
-
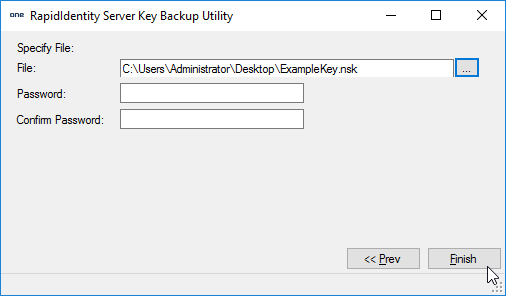
Click the ellipsis button (...) to name and save your backup file. You can create a password for this file if you ever need to go through the key restoration process here, but it is not required.
-
Once you’ve completed Step 5, hit Finish. You should receive a "successful" pop-up message.
Server Key Restoration
In the even that you need to restore the key backup that you created:
-
Click on the Restore option in the Key Backup Tool.
-
Select File.
-
Click the ellipsis button (...) to navigate and select your key backup file.
-
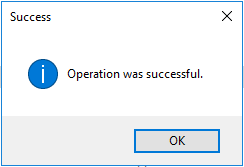
Click Finish. You should receive a "Operation was successful" pop-up message.
Troubleshooting
If you receive a failure when you go to save the key, it may be a permissions issue. This should be quickly resolved by adding the right account to the software folder's security.
-
Navigate to
C:\Program Files. -
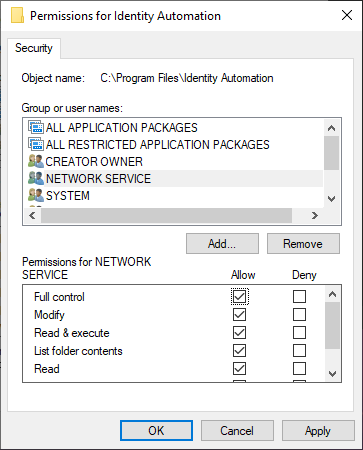
Right-click on the Identity Automation folder ("2FA" if you are v4.9.4.6 or lower) and select Properties.
-
Under the Security tab, click on Edit...
-
Click Add...
-
Add the Network Service account and click OK.

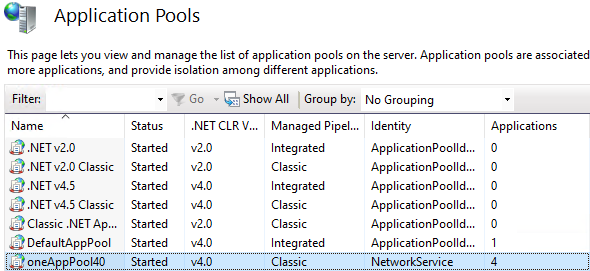
By default, the software's app pool identity is the NetworkService account. If you have a different service account for the oneAppPool40, it's recommended to add that account instead of Network Service like in this example.
-
Highlight the newly added account and check (✓) the Full Control and Modify boxes. Click OK.
-
Re-try the key backup steps and you should be greeted with a "success" message.