
It's recommended to install and update the pre-req's on the server directly. Then use the AD Lookup Tool through a remote session. This guarantees that you will be on a domain-joined machine when using the tool.
You can view or edit all your created policies by selecting View All Policies in the left-hand pane in the Admin Portal.

To utilize the Active Directory Lookup Tool to create a policy, you will need the following:
- The MFA server is domain joined
- ActiveX settings updated
- Client-Side Components installed - the matching version to your MFA server (the download for these can be found in our Downloads & Release Notes section)
- If you do not wish to use IE, you can set up IE Compatibility Mode for Edge
-
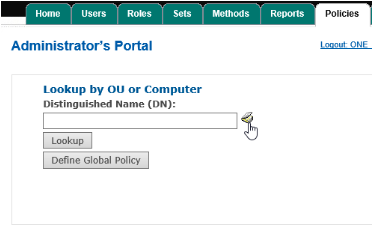
In Internet Explorer on the ONE Admin Portal as the one_sys_admin user, go to the Policies tab.
-
To the right of the look-up box, select the AD Tool.
-
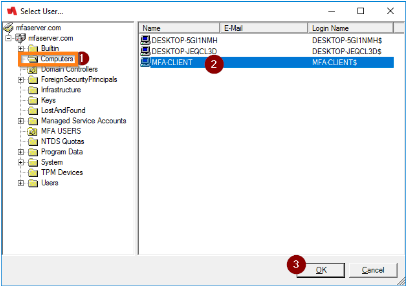
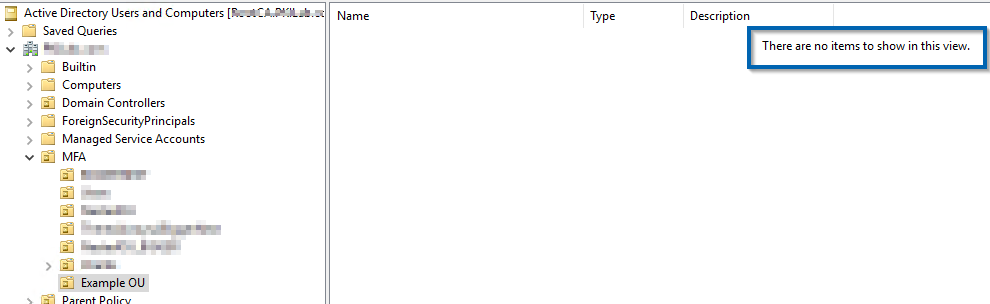
When the AD Lookup Tool opens, find the OU you want to make the policy for and click OK. This example shows selecting a specific computer, just be sure to select only the OU before hitting OK.
-
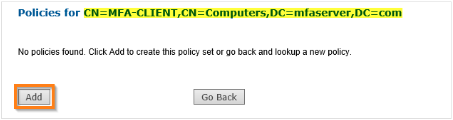
The window should close out and show the next screen showing the OU’s path. Make sure this is correct and click Add.
-
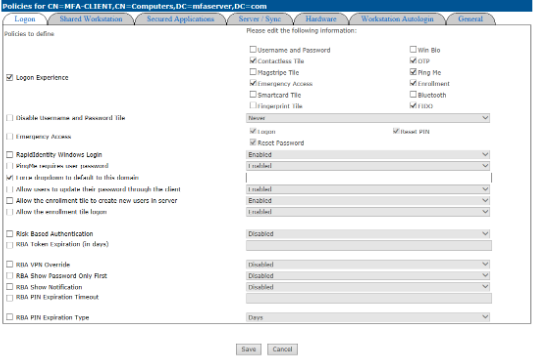
The policy editing window will come up. Step through each tab and set your client settings as needed.
-
When you’re done editing the policy, click Save.
-
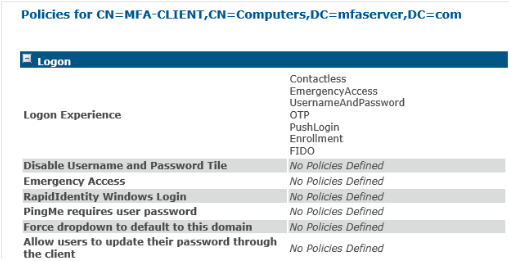
The following screen is your new policy in the View format. Your policy is now optimized and will be pulled down by the set OU’s computers at their next server synchronization.
Troubleshooting
If you experience any issues creating a policy or receiving the error "Please enter a valid distinguished name", make sure that at least one computer resides in your target OU in AD.
⬇️⬇️⬇️
