
Bulk Migrate is our solution to not having a built-in way to update user information en masse through the web portal. To do this, we generate a SQL report that can be copied to a CSV file where we can make the necessary changes, then upload the CSV file to the server.
These changes are instant and only update the values changed.
Part 1 - Getting User Report From SQL
- In your SQL database manager, run the following query:
-- Queries the following data with their respective titles:
-- UserName, Domain, Email, Language, AuthSet, Role, UserState

USE [ONE]
SELECT
Users.name AS 'UserName',
Users.domain AS 'Domain',
Users.email AS 'Email',
Languages.name AS 'Language',
Auth_Sets.name AS 'AuthSet',
Roles.name AS 'Role',
States.name AS 'UserState'

FROM (Users
INNER JOIN User_Roles ON Users.user_id = User_Roles.user_id
INNER JOIN Roles ON User_Roles.role_id = Roles.role_id
INNER JOIN Auth_Sets ON Users.auth_set_id = Auth_Sets.auth_set_id
INNER JOIN States ON Users.state_id = States.state_id
INNER JOIN Languages ON Users.language_id = Languages.language_id )

-- Excludes the 'ONE_sys_admin' and  and 'Password Only' accounts
-- to avoid accidental modifications to those accounts/account types
WHERE Auth_Sets.name != 'RapidIdentity Password Only'
ORDER By Users.name ASC
*You can add additional WHERE clauses to refine your results, if necessary.
-
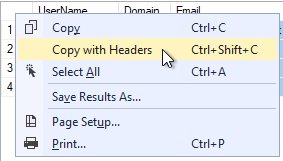
In the results page from the query, copy the results. The column headers are optional.

⬇️⬇️⬇️
-
Paste the results to your CSV editor of choice (this example utilizes Google Sheets).

-
Modify your users' information as necessary. Be sure to leave the headers alone.
ExampleIf you are setting some of or all of your users to New Credential so that they can use the Enrollment Tile, you would change all instances of Steady State.
-
Once your changes are complete, save your file as a .CSV.
Part 2 - Uploading The .CSV
- In your Admin Portal, go the the Users tab.
- On the left-hand side, click New Users.
- In the new dropped down menu, select Bulk Migrate.
- In the main Bulk Migrate screen, click Choose File to open your file explorer and select your new .CSV file.
- If you kept the headers like this example, be sure to check (✓) the "Ignore First Line" option.
- Finally, click Bulk Migrate to upload your .CSV.
