
This article goes through a base installation of a SQL Express server. Other settings and options can be modified as needed, but these are the basics that are required to work with RapidIdentity MFA. Google search for the SQL installer of the version you want and be sure to download it from the official Microsoft website.
Installing SQL
-
Right-click the SQL installer and "Run as administrator". Click "Yes" when the UAC prompt appears.
-
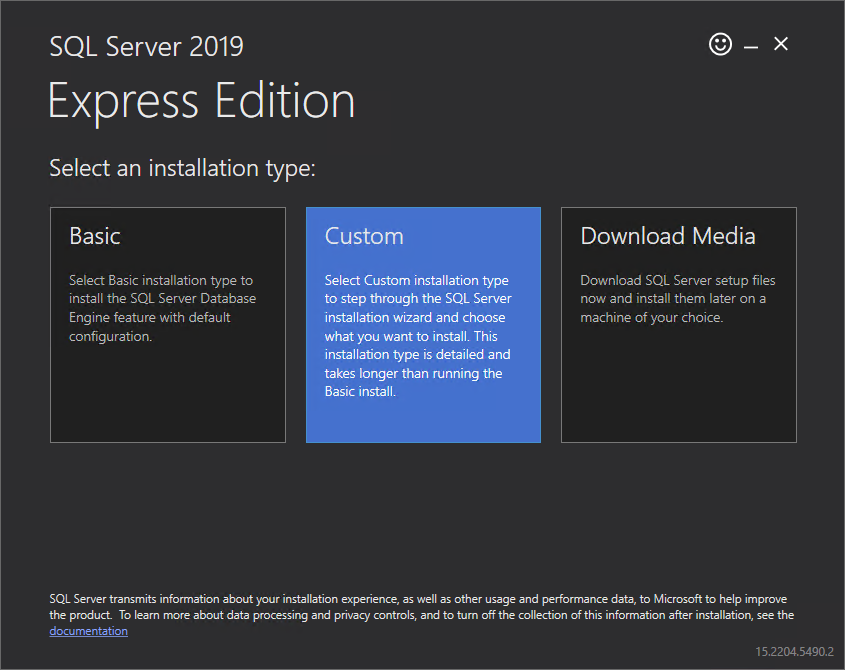
When the install wizard appears, select the "Custom" option.
-
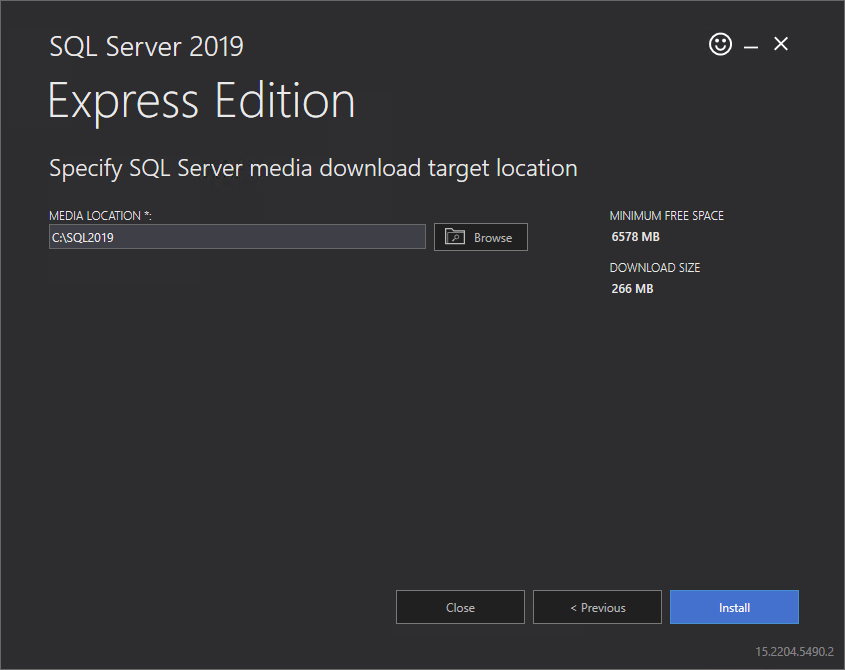
On the next page, confirm or change the install path and click "Next".
-
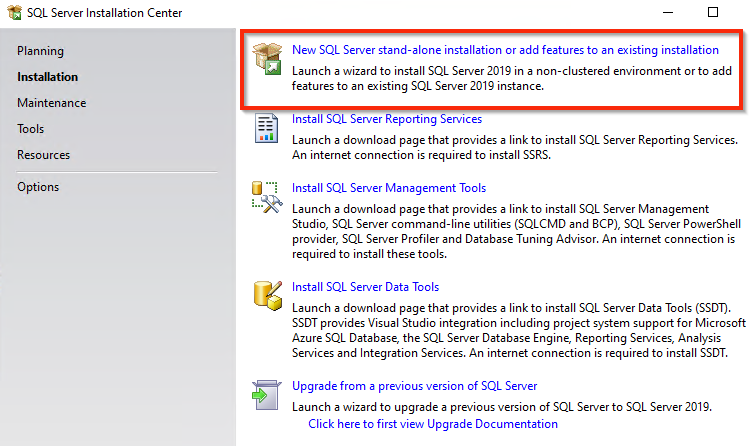
The SQL Server Installation Center window will appear. Select "New SQL Server stand-alone installation...".
-
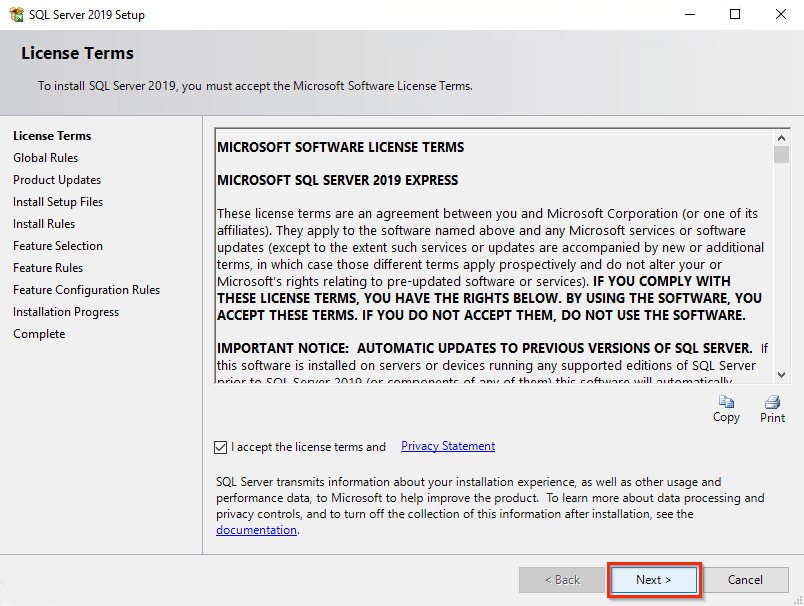
Accept the license terms and click "Next".
-
Wait for the Install Rules to check the respective rules.
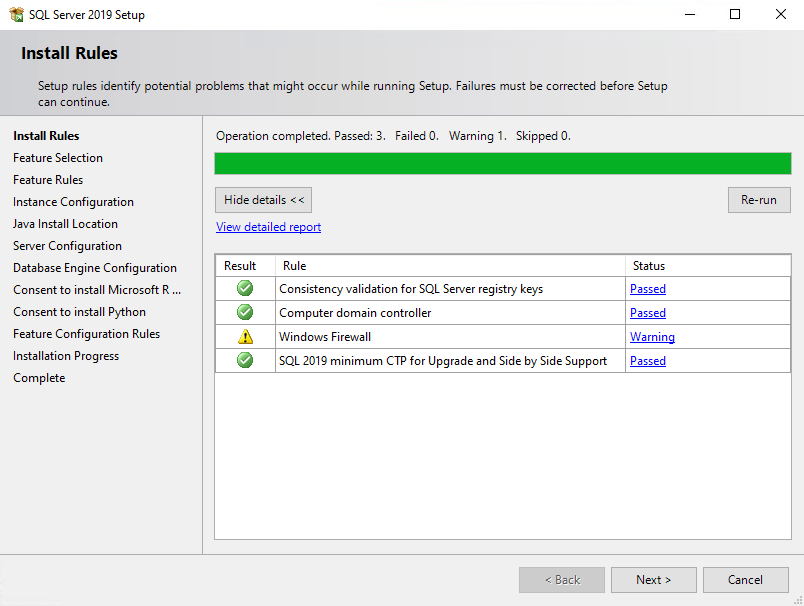
If you you have not opened the SQL ports per the MFA Server Requirements page, you will receive the warning symbol next to Windows Firewall. It is only a warning and can be ignored at this point in the process. However, you can also open the port in your firewall and re-run the check before moving on.
-
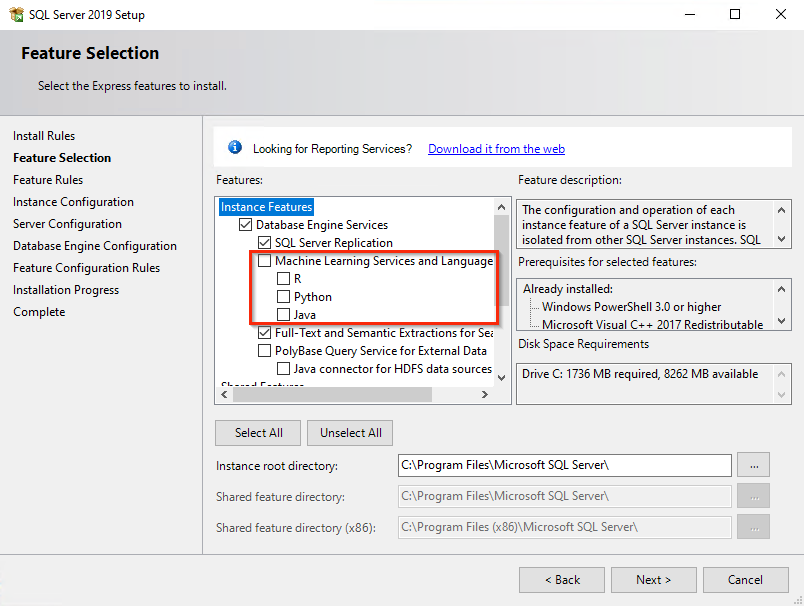
On the Feature Selection page, uncheck "Machine Learning Services".
-
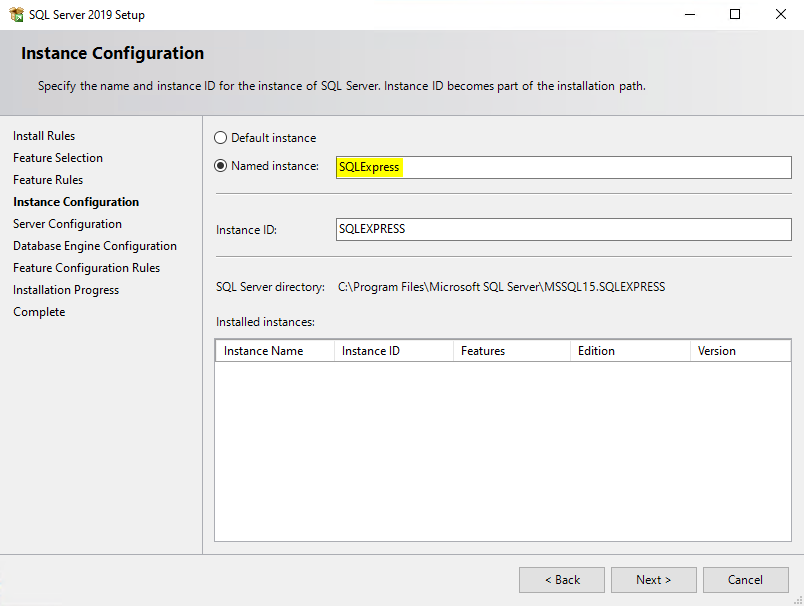
In the Instance Configuration page, you can stick with the "Default instance" or "Named instance". Click "Next".
-
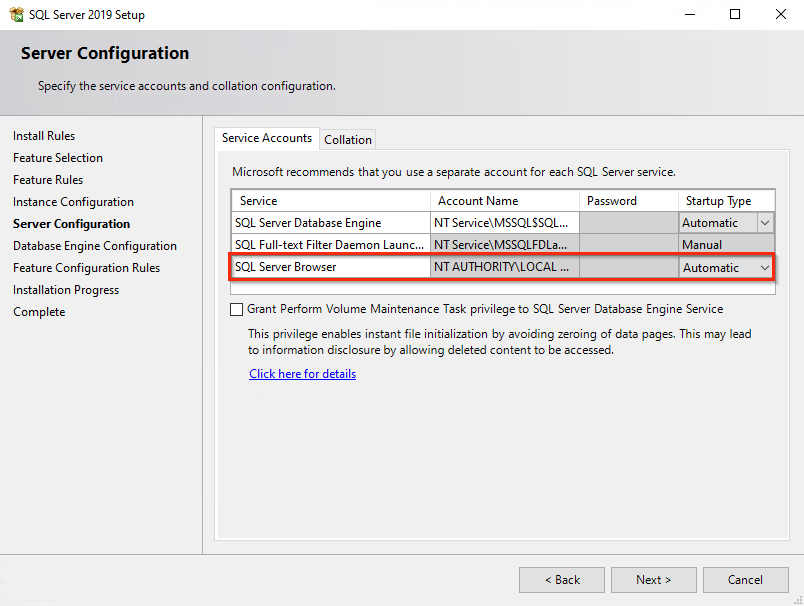
Set the "SQL Server Browser" to "Automatic". Hit "Next".
-
Select "Mixed Mode" and set the Server Administrator (sa) password. You can add more users users as neccessary in the Specify SQL Server administrators section.
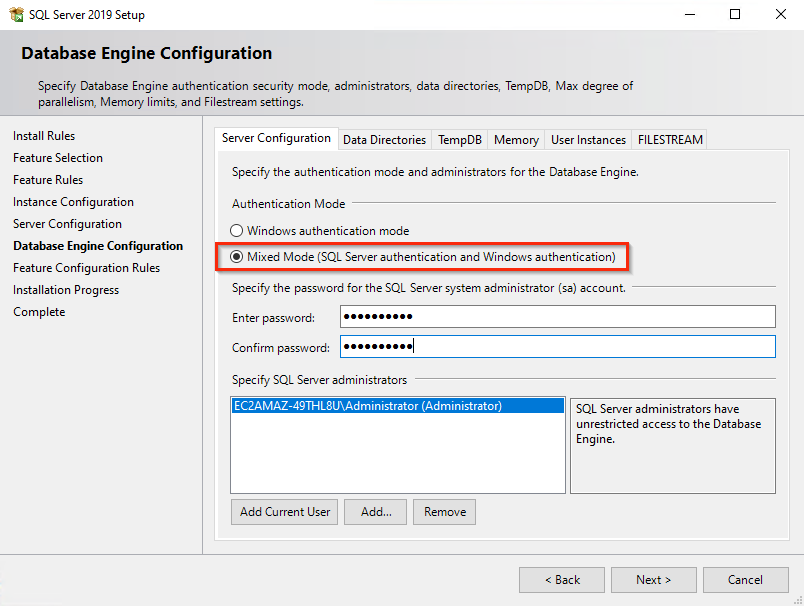
This option is important so that other users created later have access to the MFA database. If the server is in "Windows authentication mode", any SQL usernames and passwords will not have the access needed to the database, especially when setting up the connection strings between the database and MFA software.
-
On the Feature Configuration Rules, click "Next" when ready to begin the installation.
-
Wait for the install to complete. When it brings you to the Complete page, click "Close".
Installing SQL Server Mgmt Studio
-
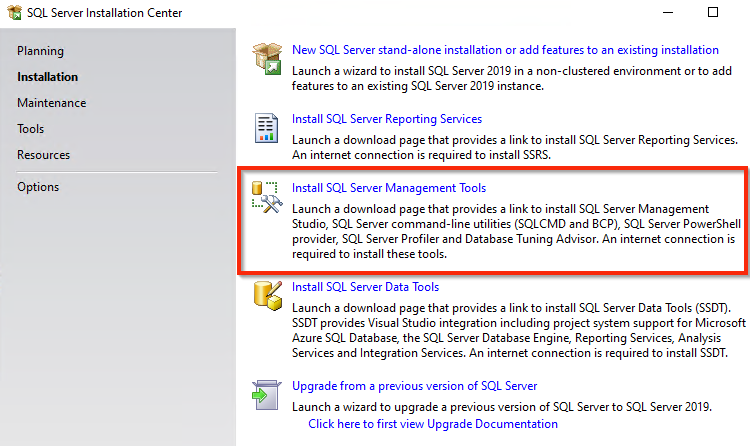
Back in the SQL Server Installation Center, select "Install SQL Server Management Tools".
-
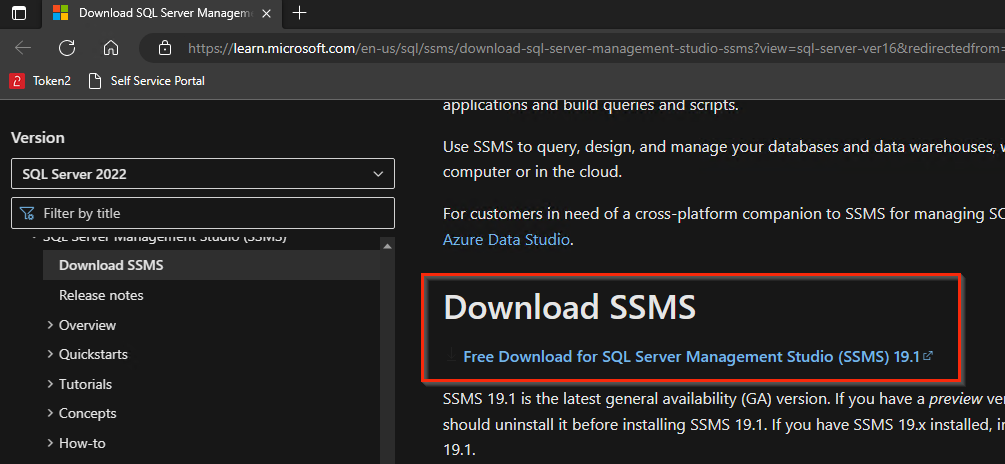
Your default browser will open to Microsoft's download page for the latest SSMS installer. Scroll down to Download SSMS and click the "Free Download..." link.
-
Once the installer has downloaded, open it and click through the wizard to install SSMS.
Post Installation Configuration
-
In the Start menu, search for the SQL 20XX Configuration Manager and click to open it.

-
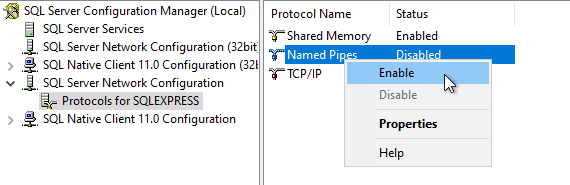
On the left-hand side of the manager, expand:
SQL Server Network Configuration > Protocols for SQLEXPRESS
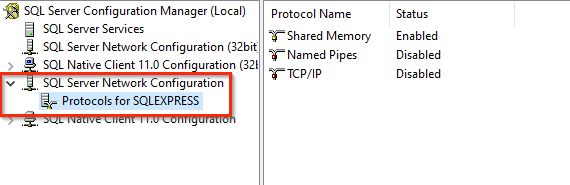
The SQL server name may appear differently depending on your setup, but the wording will be the same: "Protocols for [server name]"
-
On the right-hand side, for both Named Pipes and TCP/IP, right-click and click "Enable".
-
A warning will appear telling you the SQL server service will need to be restarted. Click "OK".

-
Once both protocols are enabled, go to SQL Server Services on the left-hand side.
-
Select your "SQL server (server name)", right-click and select "Restart".
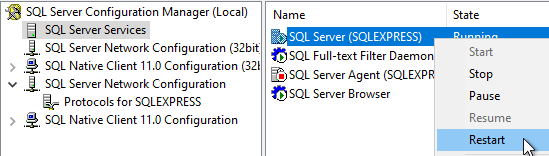
Once the restart has complete, you have completed the SQL server installation and configuration.