
Creating a custom role allows you to tailor the privileges to the assigned users while in the Admin Portal. What's assigned in the roles does not affect their login methods or their logins to MFA client computers.
Create a Role
- Go to the Roles tab.
- On the left-hand side, click Create a New Role.

- A pop-up window will appear. Here you will create a name for the role and select (✓) all the boxes necessary for the role to perform.
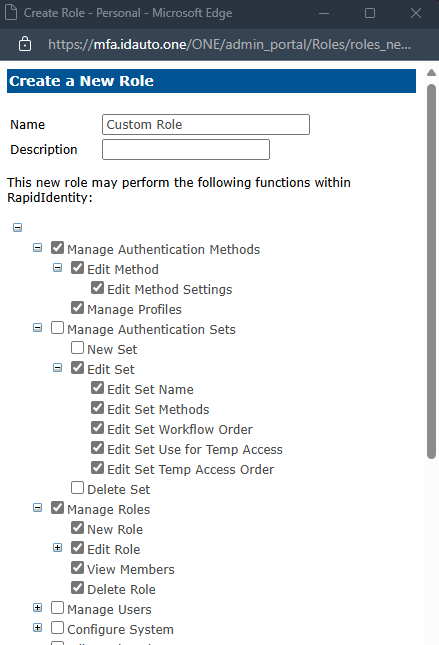
-
When finished, click Create a New Role.
-
The window will close out and you will see your new role in the Role List.

Assigning a Role
- To assign the role to a user(s), go to the user lookup in the Users tab.
- Click their username to bring up their User Information Page.
- Click Edit.
- In the Edit User pop-up, click the dropdown box for Role and select your new role.
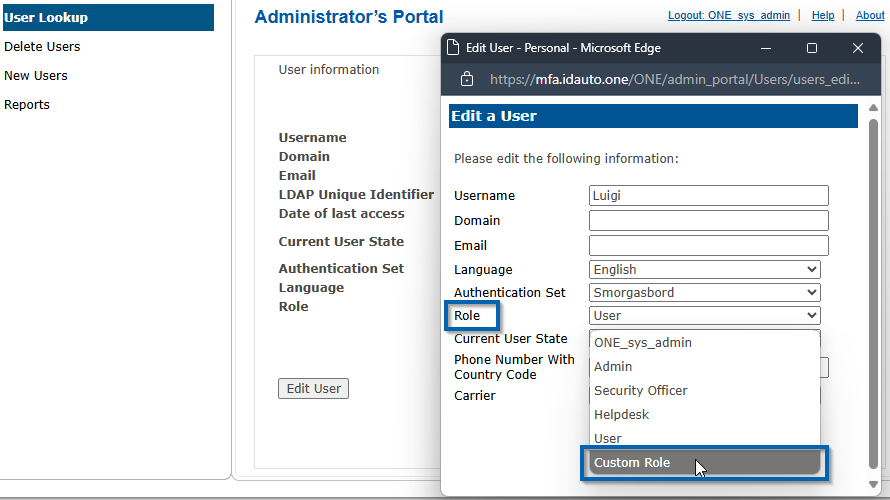
- Click Save when you're done.